Heljan GWR 43xx 2-6-0 loco: Repainting
John Cockcroft (Pictures by the author)
Gazette volume 21 number 1 - Nov 2019
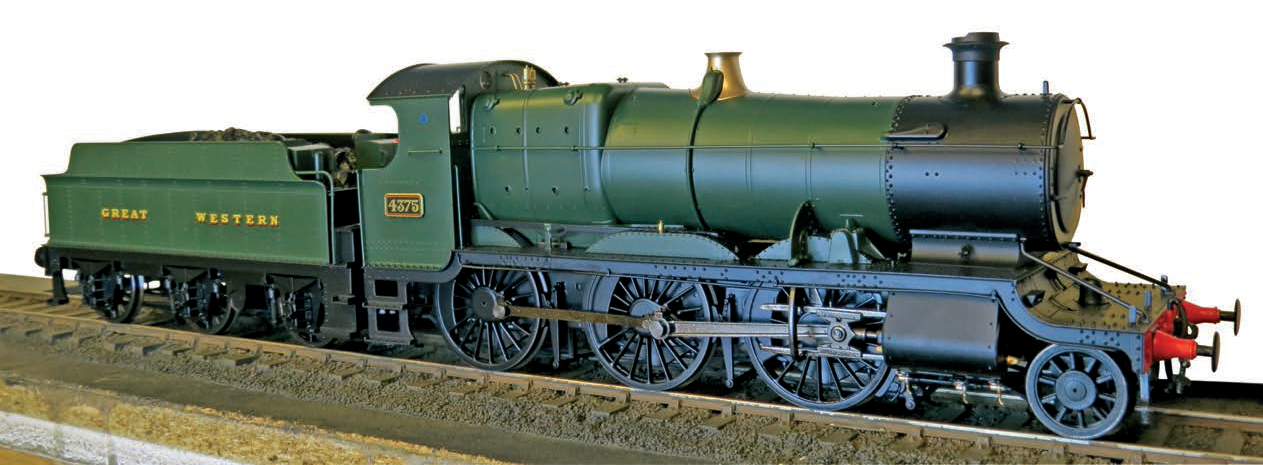
 A snap of the model as it comes from the box – except you have to add a few parts, like the pony truck!
THIS ISN’T A REVIEW of the Heljan 43XX because it has been reviewed before and is a superbly accurate model and insofar as I have experience of it, runs really well. However when I got the model and had finished thinking to myself what a great representation of the prototype it is, I decided that I should really add a bit of myself so it fits better with the rest of my stud of GWR locos.
My main concern was that I wasn’t all that happy about the colour and finish of the model because it looked too clean with the result that it looked more like a model as opposed to a real locomotive sitting on track in the 1920s. So I thought I would strip it down a bit to make spray painting easier, which is the point of this short article. You see this model is not like most of the model locomotives I have painted in that they usually have a chassis that sits under the footplate and that part of the loco from the footplate and above comes off after various screws are removed. The Heljan model does not come with any instructions, though it does have a sheet of paper with small drawings of all the many components with part numbers alongside each part. But when you turn the model over there are lots of crosshead screws under the chassis and it is a bit of a gamble which ones to undo. First however I unplugged the small plug under the front of the tender and detached the tender.
Naively I undid a couple of scews under the smokebox and then wondered which others would remove the body. I found a couple at the back where they usually are and undid them – but nothing happened. Not knowing what to do I put them back and found a couple under the fire box. Suddenly the whole boiler, which was surprisingly heavy, dropped into my hand! “Eeek!” I howled, (or some other expression of shock and terror), and gasped with relief that my hand was there at all. The boiler that you can see is a wicked plastic deceiver that hides a large metal casting in which the motor is housed. Thin wires link the motor to the rest of the model which is why I was glad I caught it. The plastic boiler slides off the casting which I carefully put back on the footplate.

The aftermath of the 'Eeek Moment'. The plastic boiler slides off the cast weight/motor housing, here it is sitting back on the footplate and chassis.
On a GWR loco the boiler is the biggest green bit and that only left the cab and splashers to consider. I found that the cab is attached by four screws under the back footplate including the ones that I had previously undone and returned. These four screws go into four plastic cubes located under the cab – all of which came loose from their mountings leaving me with what looked like four dice with which to gamble on the reassembly of my £650 investment. At that point I called it a day and went for a lie down.

The motor is big and has a flywheel and is silent and quite powerful. I was worried that the wires are a bit vulnerable and thin and liable to get caught up in the mechanism or trapped by the plastic boiler. I haven’t noticed any problems though, and I was careful about how I pushed them into place on reassembly.
I used Precision 1906-1928 GWR green (P9) and having got the cab and boiler off it was easy to mask off the smokebox and cab windows etc., and spray them with an airbrush in the usual way. I think that the tender body comes off by releasing three screws. It contains some of that circuit board nonsense that people who play trains by faffing with tiny buttons use (DCC). It is actually quite an easy masking job to enable the tender body to be sprayed and I was too neurotic to undertake any more demolition on this model. Before I sprayed anything, I pinged the number plates off the cab because I wanted to renumber the model using some Severn Mill plates. I found the Precision paint took well to the plastic body and I deliberately left the Great Western transfers as faint shadows to ease the fitting of HMRS replacements. I hand painted the splasher sides on the footplate and overpainted the buffer beams with red.
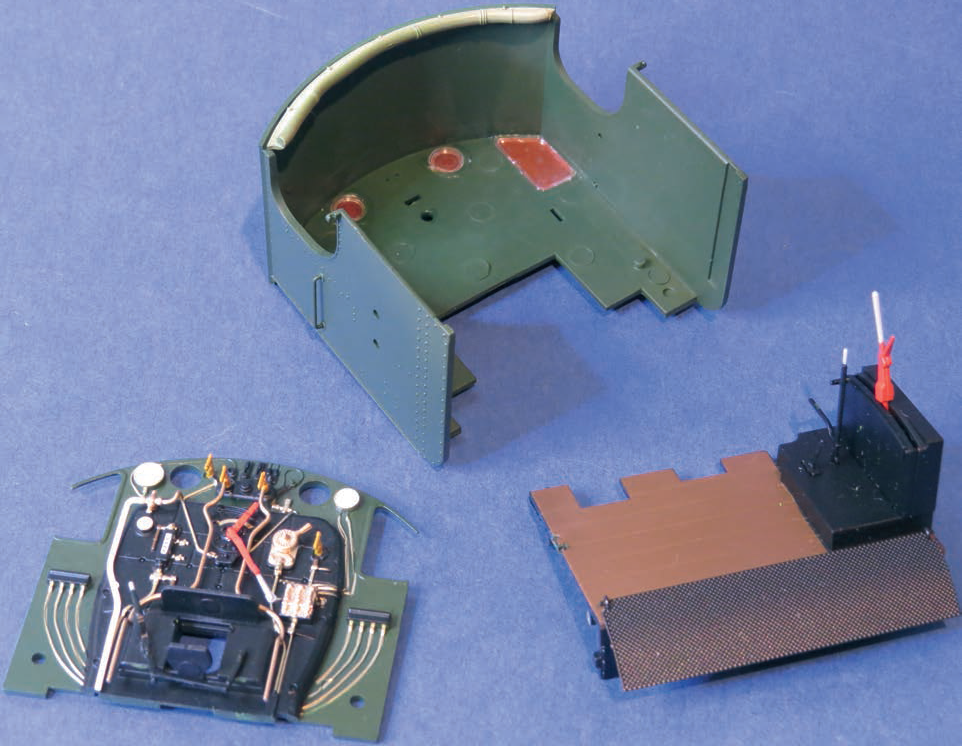
I approached reassembly with trepidation. The cab comes into bite sized lumps with a floor and a backhead all virtually falling out. I was apprehensive about the location of the four blocks that sit under the floor because they have to be correctly located. I found that by looking carefully at the marks where they had come adrift I could glue them in with Plastic Weld so that the cab can be securely fastened. The cab rear handrails are vulnerable but I got them into the holes in the footplate. While I was considering each move, I carefully removed both the AWS bell in the cab and the very long delicate wire that sits under the footplate valance on the right hand side because I model the 1920s and AWS was not fitted at that time.
There is a tremendous amount of detail on this model but I found that the representation of the brake operating cross shafts and rods were very very delicate and fragile and I broke some of them simply by handling the model. I reglued what I could with super glue. Some bits were a bit knocked about but as they are virtually invisible when the model is on the track I didn’t spend time replacing them. Oddly the tender brake rodding is more robust. When the boiler and the heavy inside casting came out along with the motor, the worm gear came with the motor but the worm gear on the driving axle remained on the engine. I carefully ensured that the wires would not be trapped and located the worm and boiler accurately so that the worm and gear engaged and the boiler sat properly on the footplate. The four screws seem to effectively align the gears and the boiler was as good as new. I found that the model will not run without the tender and concluded that the whole of the pickup is done by the tender and everything worked fine once the tender plug was pushed in and the drawbar screwed in place.

The three main parts of the cab unit. There is a strut that goes up the left hand cab side from the footplate and the cab handrails have to be carefully located on reassembly. The cab windows are red because of masking film.

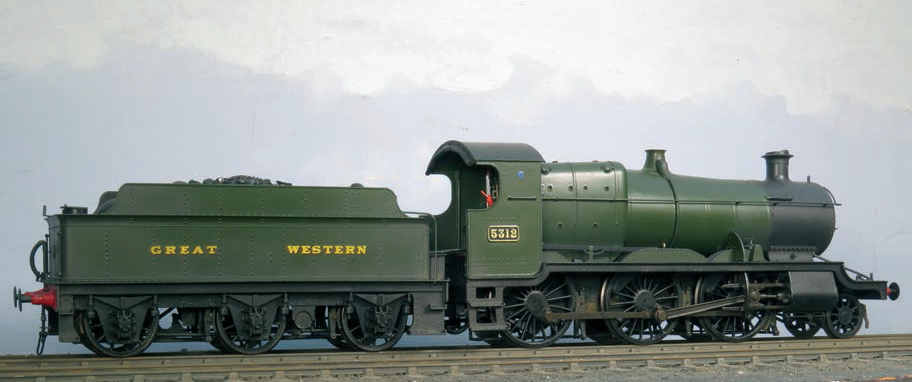
All I needed to do then was to lightly weather the model and I think the end result is more convincing than the out of the box version. I don’t think I have done much harm with all my seat of the pants excitement, but I hope this article is a warning to any of you who consider a repaint of one of these models. Were I to do it again I think I will consider a bit more masking and a bit less dismantling. Of course like all these Chinese products they are likely to be difficult to repair if they go wrong. I wonder if anyone will bother to commission spare parts for them. I imagine the contracts with the producers are pretty tight and prescriptive and the thought of spending more money on boxes of spares may be out of the question. Or am I wrong?
 The finished model. I renumbered the engine 5312 and lightly weathered it. I think it catches the elegant Churchward lines very well. I had forgotten to remove the masking on the cab windows when I took the photos. Maybe I should have switched on the red eye function on the camera!


