Adding interior detail to open wagon kits
Peter Jary
Words and pictures by the author
Whilst desiring a certain private owner wagon that is not currently available ready to run from Dapol or Lionheart but is still only available from the Slater’s range, I was faced with that infuriating situation in not having any interior detail moulded inside their kits. I know I could just fill a wagon with coal as seen at so many shows
these days or make a fair facsimile of it if I cared to plagiarise John Hayes’s wonderful book on the 4mm coal wagon by Wild Swan (still available) and add it myself. Then I remembered reading, way back, an article that talked about a set of thin brass inserts that could be fitted inside a blank Slater’s wagon wall. I looked on the net and
discovered they are still available via David J. Parkins on www.djparkins.com and contain ALL the variants of
models that Slater’s produce. Gloucester, RCH and Charles Roberts versions of planked wagons are all catered for.
My ‘raison d’etre’ for this article is to try and give advice as to how to insert these very thin and delicate brass frets together with my experiences of the kit.
 Photo 1. What you get.
 Photo 2. What’s inside
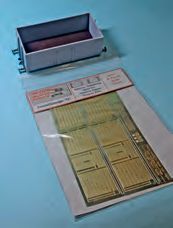
Photos 1 and 2 show what the detail kit comprises of, in this case parts for a Gloucester C&W Co. 7 planked side and end door version. A very full and comprehensive set of instructions is enclosed within the polythene bag covering all the models available plus a detailed schematic diagram.
When I initially tried this modification kit, I precisely followed the instructions and both parts dry fitted in situ, making small adjustments to the fit before attempting to apply glue to the surface. When satisfied, I used Evo-Stik contact adhesive on both of the surfaces to be joined. Where the glue seeped through the brass planking it was removed by vigorous rubbing with the thumb until the glue dropped off in a sticky ball. It could also be wiped clean with a little white spirit. Don’t use anything other than Evo-Stik as this glue allows the piece to be adjusted whilst in place for a little longer, whereas a ‘super glue’ type will fix in seconds precluding any adjustment.
I started with both long sides making sure they fitted PERFECTLY and did not allow any overlap the tops of the wall. This is important as the capping strips supplied are required to fit along the rim of the box section. This then will enable the capping clips to be fitted over the top of the strips. I cannot stress enough the need to dry fit each and every piece at each stage, making sure that each piece fits exactly.
Then I fitted the end sides of the box, necessitating a slight trim all round for a perfect fit. The capping was next. Not all wagons were fitted with it, so photos again are a must. Similarly, not all wagons were fitted with capping clips. When and if the clips are fitted, I used a dab of enamel varnish to secure them and when dry they
would be doubly secured with a coat of paint and varnish.
 Photo 3. Where it goes on the model.
Finally, apply a coat of undercoat grey to the brass surfaces and then the top coat finish. Incidentally, the kit even includes three load clips, (one spare), to be made up. The instructions are VERY comprehensive as I’ve said, and should allay any questions directed at the prototype.


