Detailing a Lionheart 45XX Small Prairie
Mike Baker
Gazette - August 2016 (Vol 19 No.12
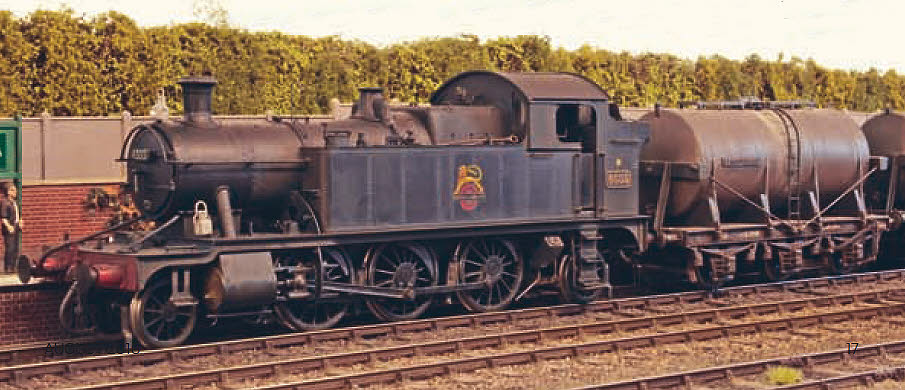
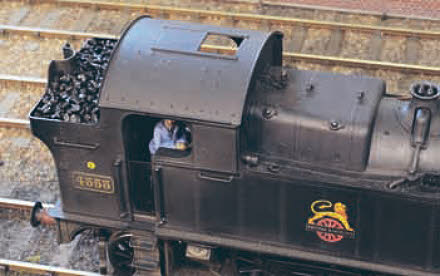
The finished model on the milk train
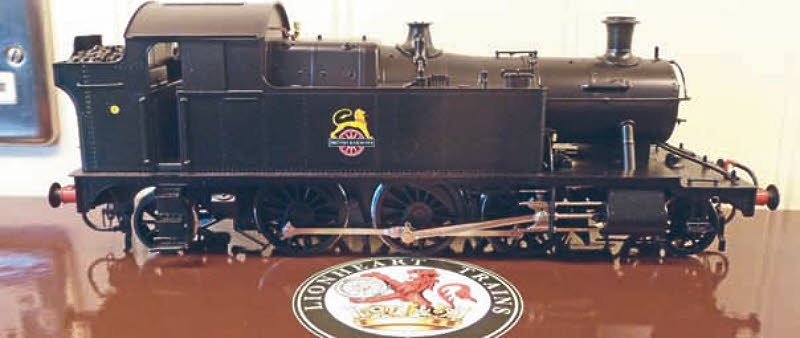
The model as supplied
The Lionheart 45xx loco appeared in no less than twelve different guises according to period, ranging from the
original small bunker version to the later locos with extended frames and bunker, outside steam pipes and curved
drop front.
Liveries also ranged from early Great Western fully lined (including the brake hangars and guard irons) to late
BR lined green, and Lionheart have gone to great lengths to ensure each loco is authentic for the period represented.
I chose a BR black liveried unnumbered loco, and this version represents locos from 4555 to 4574. I
decided to portray the loco as 4555 (now a preserved loco) as it might have appeared when allocated to
Westbury around 1959/1960.
There is a useful article in Great Western Journal Nos. 16 and 17 on this very loco. It
includes some good detail photographs of 4555 both pre and post-preservation. This engine remained in
BR black livery with the early emblem until purchased from BR for preservation in 1963.
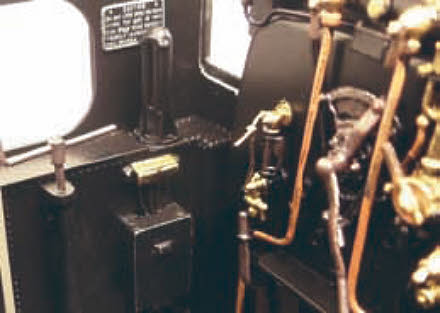
Number plates were obtained from Severn Mill, including the Westbury (82D) shed plate, and the standard GWR
caution sign as fitted to the loco cabs.
The level of detail on the model is quite staggering, and not only the bits that can
be seen. For instance, the front sandboxes can be glimpsed on the inside of the
frames, the brake pull rods are fully detailed and the vacuum cylinder is there. I did, however, note a few areas
where I thought I may be able to improve this already excellent model.
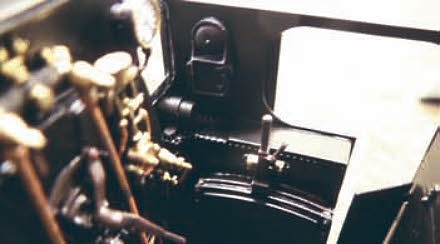
4555 was fitted with ATC gear and the shoe is correctly fitted below the rear buffer beam.
The ATC fittings in the cab and the battery box, however, are not represented. I noted 4555 had the battery
box fitted in the cab, whereas some of the class had this item fitted behind the cab step on the driver’s side.
Also, as part of the ATC gear, a small vacuum cylinder fitted on the tank top, which passed through to the cab
by means of a hole cut in the front cab sheet. The cylinder was turned from brass as two separate items
and fitted on the tank top either side of the cab front sheet. The securing strap was from brass strip.
The (working) cabside doors lack handles and, as I could not find any castings available for them, they were
made up by modifying 4mm scale lost wax smoke box door handles. These were fitted in holes which were drilled in the
doors by holding a piece of wood behind the door to support it whilst using a pin chuck.
The cab roof is .020in brass and secured to the loco with magnets, making for easy removal. Whilst the rainstrips
are located along the eaves, correct for the loco during this period, none of the rivets are present.
There is a row of nine rivets just up from the rainstrips either side, and I made up a collar to fit over the
dolly on my Graskop rivet tool to space these off the rainstrips. This worked well, so others
were added, with the positions judged from photographs. I have since visited the preserved example and taken my own
photos, so I may now add a few more! The roof was sprayed to cover the now shiny brass rivets.
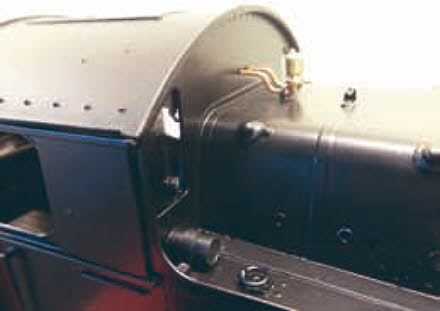
The horizontal handrails on the cab side and bunker are fitted virtually flush to the body, likewise the handrails
on the boiler by the front of the tanks, making life difficult for our 7mm scale loco crews
to get a hand hold. I deliberated for some time whether to attempt to correct them,
unsure if this could be done successfully without damaging the finish. The handrails look OK from some angles,
Hmmmmm.
I decided to ignore the problem and weathered the loco to represent it as recently having had a smoke box job, but
otherwise not having had a clean for a while. I was pleased with the result, but
those handrails kept playing on my mind. Eventually I decided to see what could be done.
With the chassis removed there are eight small screws, six along the inside of the valence (or hanging plate),
and two more under the bunker which, when removed allows the running plate to be detached. This in turn gives
access to four screws retaining the cab floor and backhead.
Once the cab floor/backhead is removed, the wires from the DCC chip need to be unplugged, as the chip is
attached to the front of the backhead (if you see what I mean).
At this point the remaining loco body needs to be handled with care, as the bunker is only supported by the small
amount of metal above the cabside cutouts. Now it is possible to remove the
handrails, which are attached with solder.
I did not consider it a good idea to unsolder them, on account of possible damage to the paintwork, so after carefully prising them away from the body at their centre, I snipped them in two. The two legs were then twisted until they either came away or snapped off, unfortunately only four came away cleanly. The ones that had snapped off, leaving a short stub of wire then had to be drilled out. This was done by carefully filing the end of the wire flat and centering a .45mm drill on the end of the wire. To my amazement this worked quite well, and after a short while I had all the holes clear ready to fit the replacements using .45mm wire.
The new
handrails were bent up leaving a longish
leg inside which could be bent over
before fixing with a dab of Araldite. I am
pleased to say that all this work was
carried out without damage to the paint
finish.
Fire irons were made from soft iron
wire, and the Great Western style lamps
came from Dragon Models. As the smoke
box lamp bracket is not offset from the
centreline as it should be, I drilled a hole
in the centre bottom of one lamp, so that
it sits centrally when fitted.
Finally a driver and fireman were
added. As purchased there is a painted
crew provided in an accessory bag, but I
decided to use some figures I had to
hand.
The result of the work has for me, been
worthwhile, and I feel I have put my
personal stamp on the model.
Most of the modifications and
additions are relatively straightforward,
although the replacement of the handrails
is definitely not for the faint-hearted.
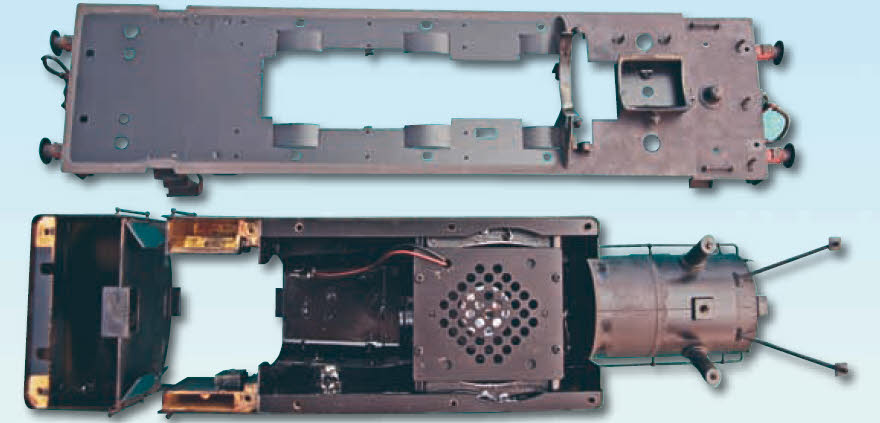
The body separated from the running plate to gain access to the handrails


