Hachette Partworks LNER A4 4-6-2
Prepared by: Tommy Day
Originator: John Taylor
Thread and Forum Title Construction on the `never never` Hatchette Partworks Mallard A4
Thread start date Feb 23, 2017
For full Forum thread click here : - Forum article
My subscription comes to an end next month so I have been making a start on this enterprise.
Bearing in mind of course Hatchette produce their kits for an absolute novice there are bound to be compromises. However, the highly detailed
instructions are second to none.
There have certainly been a few quality deficits, but Hatchette have replaced all defective parts very efficiently as they have done with any parts damaged in the post.
The most crucial has been the driving wheels.
The original set supplied could not be quartered and had been made with absolutely no understanding about such matters.
Mallard has been designed to be made as either a static display model or a working loco and the construction method suggests superglue throughout.
To facilitate the adhesion process all the brass and nickel silver etches have been coated with lacquer. I intend to make this a soldered construction and so efficient ways of removing the lacquer have had to be found.
After discovering that some of the tried and tested products are no longer as good as they used to be i have found that Wilkinson`s paint and varnish remover has been the fastest.

The removal factory……………………… total immersion for about 90 minutes allows the lacquer to be easily brushed off in water followed by a polish up with wirewool although this is`nt totally necessary.
Unusually, it took Polycell advanced paint stripper to remove the factory applied paint from the body.

I have found the quality of the etches to be excellent and a very sturdy chassis framework can be achieved.

Hatchette provide a motor and gear box as an add-on cost £99 and is totally inadequate for a working loco.
Being of a `tight-fisted nature` I came across an unused large Sagami motor and later a `Home of O Gauge` 36.1 foldup gear box on ebay for a tad over £30.
After assembling accurately and `polishing the gears` with Tcut it has turned out to be very powerfull and quiet.


The wheel treads are `chrome` plated and an obvious (eventually) problem has been the poor quality cheesehead screws being too long, which has prevented them from being tightened fully, resulting in wobbly wheels.

the solution has been……………… use Slaters originals……..
Chassis detailing and brakes are a combination of mainly whitemetal and in the case of the axle springs Mazak.


———————————————————————————————————-
Buckley10339 - Feb 23, 2017 at 9:31 PM
Hello all you fellow hachette builders.I too have been beavering away with this build as have three of my friends.Up to a couple of weeks ago everything was going quite nicely then after receiving the last rear pony wheel I decided to put the chassis together and test it.It runs backwards and forwards on my 11 ft of test track but will not go round the peco point in the middle.On investigation I found that the rather odd rear pony set up which is copied from the DJH A4 was not getting enough movement as the rear chassis section is too narrow it's 9mm narrower than the previous Flying Scotsman partwork.As the rear pony wheel hits the side of the chassis it derails as it cannt follow the curve and allso it stops the front of the loco swinging round to allow the bogie to follow the rails.I think it would not be possible to run the loco on any less than a 7ft radius curve and even that may have problems.I have racked my brains to try and find a solution to this problem and the only thing that springs to mind is to widen the rear chassis by about 6mm and fit a pony Truck! Has anyone else come across this problem yet the builders on the RM website don't appear to have found it. Pat.
John Taylor - Feb 23, 2017 at 9:44 PM
Thanks for the headsup on that problem Pat. I shall be adding the front bogie and rear pony truck over the next few days. My `test track` has C&L B6 turnouts and the Mallard will be the longest chassis to date. John
Buckley10339 - Feb 23, 2017 at 9:58 PM
John,The front bogie on the partwork is fine just enlarge the slot to give as much sideways movement as poss.The side control springs work really well so no problems with the front end it's all down to the rear end I cannt call it a pony Truck as it isn't one.if you try the rear end as built you will probably need to make the slots in the inner chassis bigger for it to move at all.Please let us know how you get on i am still thinking about how to solve it Pat.
John Taylor - Feb 24, 2017 at 8:53 PM
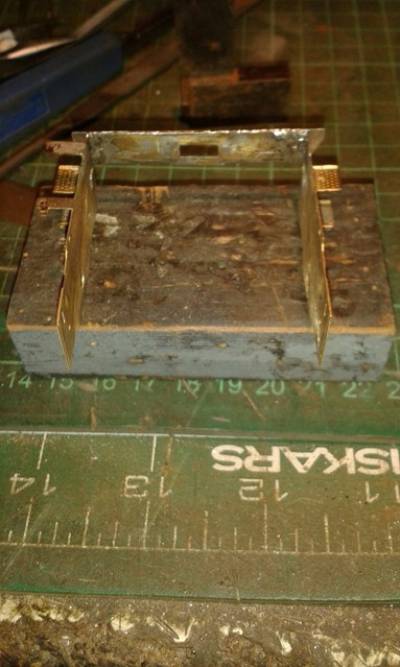
Today has been a bogie sort of day…………………………………………


The box in the middle has two centralising springs either end of a whitemetal block.

——————————————————————————————————————
Buckley10339 - Feb 24, 2017 at 9:22 PM
John,I think I have solved the narrow chassis problem.Had a light bulb moment this morning and when the out to the workshop and unsoldered the whole back end.have just come back in from a session of tacking it back together to take to a running session on Sunday to push round the track -had to take the motor out -if it is okay will give you chapter and verse .It may be better if I email you as it may take up a lot of space on here.Its a fairly easy job with a bit of resoldering and cutting and rejoining. the chassis ends up 5mm wider at 48 mm and it looks as though that's enough.Sorry I don't know how to do photos yet have tried and failed. Pat.
John Taylor - Feb 25, 2017 at 7:52 AM
Hi Pat Yes do email me. I hav`nt tested mine on pointwork yet as It`s clear I need to make the springs a lot deeper in their`block` to improve the bogie swing. John
Len Jones 14652 - Feb 25, 2017 at 8:06 AM
Morning all ,Pat has asked me to upload the pictures he took to show HIS modification.
I am sure more will follow with details .


—————————————————————————————–
John Taylor - Feb 25, 2017 at 8:24 AM
Thanks for that Pat and Len,
I see what you mean now. What radius Peco Point Pat was yours having trouble with ? At the moment I will be content with the test track at Telford, whatever radius that is……………………
Buckley10339 - Feb 25, 2017 at 8:31 AM
A quick explanation ! These are photos taken with my mobile phone and sent To my friend Len to show him what I was doing.I have no idea how to put pictures from my phone on to here.The chassis that is on the right of the first photo is a hachette scotsman one that I am converting to an A4 using additional A4 parts.The front has been modified but the rear is still scotsman and am using that as an aid to the modification of the A4.Both A4s will be as in BR days with cut away valances one early crest and one late one. Any one with any questions please feel free to ask ! Pat.
Buckley10339 - Feb 25, 2017 at 8:33 AM
John it was a standard peco six ft radius point on my test track. Pat.
John Taylor - Mar 1, 2017 at 8:06 PM
The last couple of days have had me adjusting the leading bogie and rear truck so that the chassis can run through my test B6 pointwork……

The front bogie needed its sideways travel extended and replacement thinner axle washers…………………………..

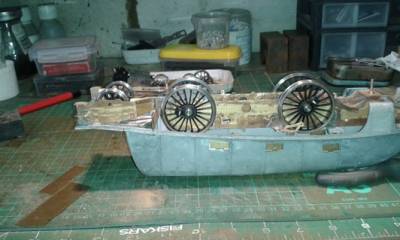
And now with her coat on……………………………………………..

The rear wheels needed their `faces` and wheel retaining screws filed flush with the wheel treads which gave me an extra 1.5mm of swing either side. This all means that a B7 radius point is the ultimate radius for this loco……… and she should be able to make it round Telford test track……….
Buckley10339 - Mar 10, 2017 at 7:32 PM
After a bit of a wait for Reading to collect the new motor to fit the story continues ! The running session at Bourne End confirmed that the mods seen in the photos work and it will now go round 6ft radius curves.all that the rear of the chassis needs Is strengthening plates putting in to stop the weak overlays flexing and a tidy up.However another problem has reared it head.this morning I put the new Finescale Brass motor unit in fitted the pickups to the center wheels and put the rods on,the extra pickups I hoped would cure the erratic running I was getting but on my test track it was still quite bad.The problem turned out to be with the front bogie with the body on the spring was fully compressed and was stopping the front and middle driving wheels from fully touching the track.Allso the pin for the bogie was too short stopping the bogie from dropping down to pass over undulations in the track. The problem was solved by unsoldered the mounting plate and moving it higher up the chassis to be 7mm from the bottom edge,the too short pin was replaced with a 6ba bolt and when the spring was put on and the bogie held with a nylock nut the loco ran perfectly.It now has just over 1mm upward movement and over 2mm down.The downward drop can be controlled with the nylock nut. This chassis is turning into a bit of a pig to get right but it's nearly there,watch this space for more ups and downs.I will post a photo of the fully modified rear end when it's all Done! Pat.
END OF POSTINGS


