How to re-profile the front end of a Heljan Cl 25
Prepared by: Steve Luck
Originator: Graham Clark
Graham Clark - Apr 13, 2018
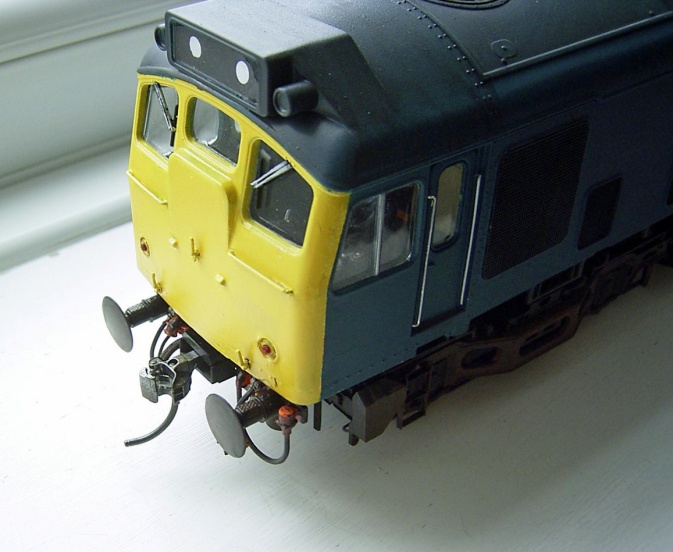
I picked up a second hand Heljan 25 and set about correcting the shape of the front. I glued a thickish piece of plasticard behind the front and pressed it to shape for a couple of days while the glue set (normal polystyrene solvent).
I had to scrape away the bottom of the plastic near the sides to allow the body to clear the corners of the chassis, but I am very pleased with the result.
The only downside is that the red LED lights are now so far back from the red plastic lenses in the front that you can't really see they are on. I could add a new pair in the front, or put in a piece of fibre optic instead of the red plastic lenses Heljan supply, but as it will be pulling trains most of the time, I won't bother for now.
Martin Long - Apr 14, 2018
That is a very clever and easily replicated modification. Presumably the plastic cab front has been stretched by the extra piece and softened by the adhesive to give it the subtle curve that you were after. It was very courageous of you as well as it could have gone horribly wrong.
GrahamClark - Apr 14, 2018
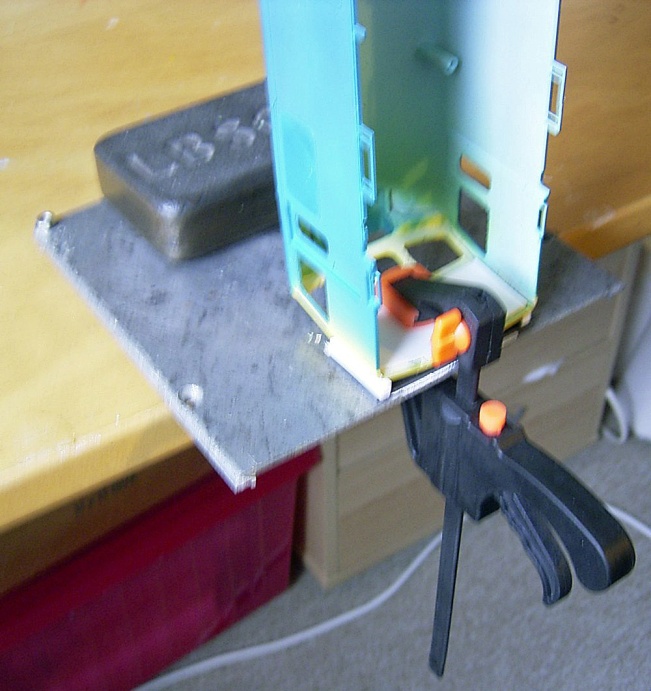
The method of reshaping the front was to make up a simple 'stand' with a rectangle of thick plasticard the same width as the loco front and with a piece of 5mm square plastic cemented to each side. This supports the edges of the loco front.
The centre section is then pulled down by the clamp in the photo. I put a piece of plasticard packing between the front and the base to get the right amount of curvature. The corners of the loco body need to be weakened to allow the angle between the front and the sides to be increased without tending to pull the sides inwards. I did this by cutting the corners of the body from inside with a razor saw about half way through the plastic. I also cut each side of the nose door to encourage the door to remain flat and concentrate the bend at the edges of it.
The inside of my model front had some paint on it that had to be scraped off to allow the solvent to work. My first attempt failed as the plastic did not stick due to the paint. The second attempt involved putting solvent on the body and on the new piece of plasticard to soften them before bringing them together and adding more solvent and clamping it.
It needed at least 24 hours to fully dry out, I left it for 2 days. It was then a matter of cutting back part of the bottom of the new plastic sheet to miss the chassis.
This was done by trial and error with a cutter in the Dremel until the chassis block fitted properly.
End of thread


